> For the complete documentation index, see [llms.txt](https://docs.pline.ai/llms.txt). Markdown versions of documentation pages are available by appending `.md` to page URLs; this page is available as [Markdown](https://docs.pline.ai/features/end-to-end-data-encryption/enable-encryption-on-existing-workflows.md).
# Enable Encryption on Existing Workflows
End-to-End Encryption can also be enabled for workflows already created and saved in the platform.
Here’s how to enable encryption on existing workflows:
### Step 1: Launch the Extension
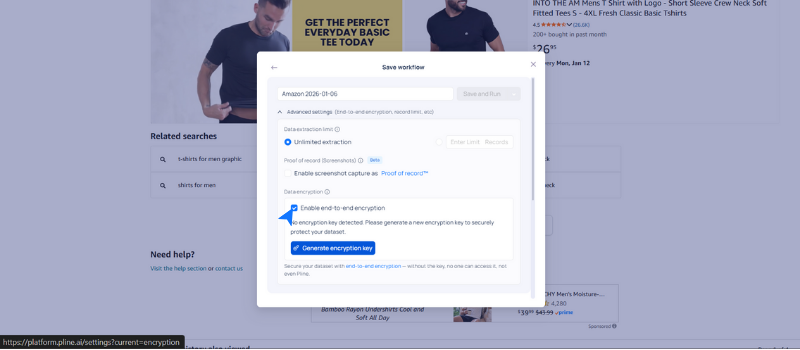
Open the Pline Browser Extension, select a prebuilt workflow, and run it.
### Step 2: Enable Encryption
In the workflow setup screen, expand **Advanced Settings** and enable **End-to-End Encryption**.
### Step 3: Generate Encryption Key
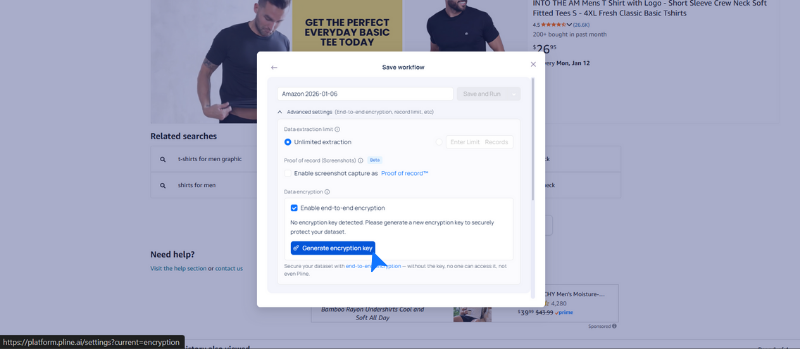
* Click **Generate Encryption Key** if you are using the encryption feature for the first time.
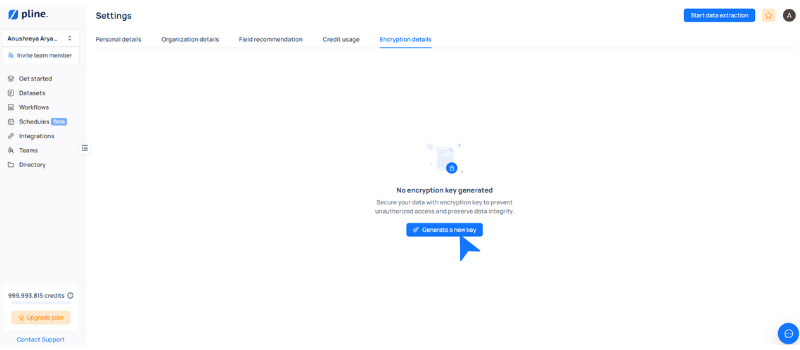
* Pline will automatically redirect you to the platform, and click **Generate a New Key**.
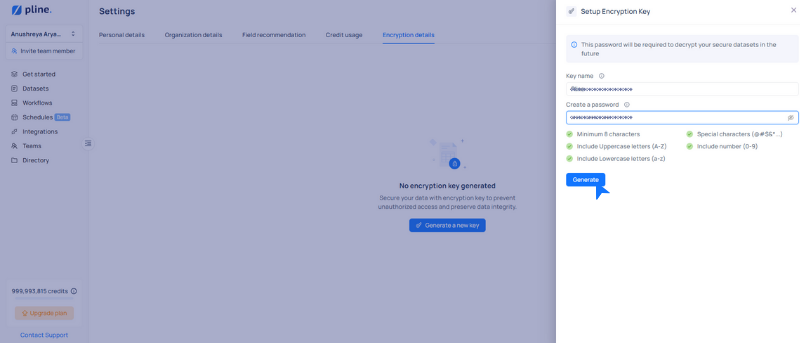
* Enter a **key name**, set a **password**, and click **Generate** to create the encryption key.
{% hint style="danger" %}
Ensure that you store your encryption key securely. Pline does not retain your decryption key and cannot recover it.
{% endhint %}
### Step 4: Create an Encrypted Dataset
Select an encryption key from the dropdown and click **Create Dataset**.
Your data will be extracted and stored in an encrypted format, ensuring complete privacy and security.